To group leads manually, you must first create or identify the primary lead in the group. Select an existing lead, or add a new lead to serve this role, then select "Create a Lead Group" under the "Grouped Lead" heading on the right hand side of the Lead Detail Screen:

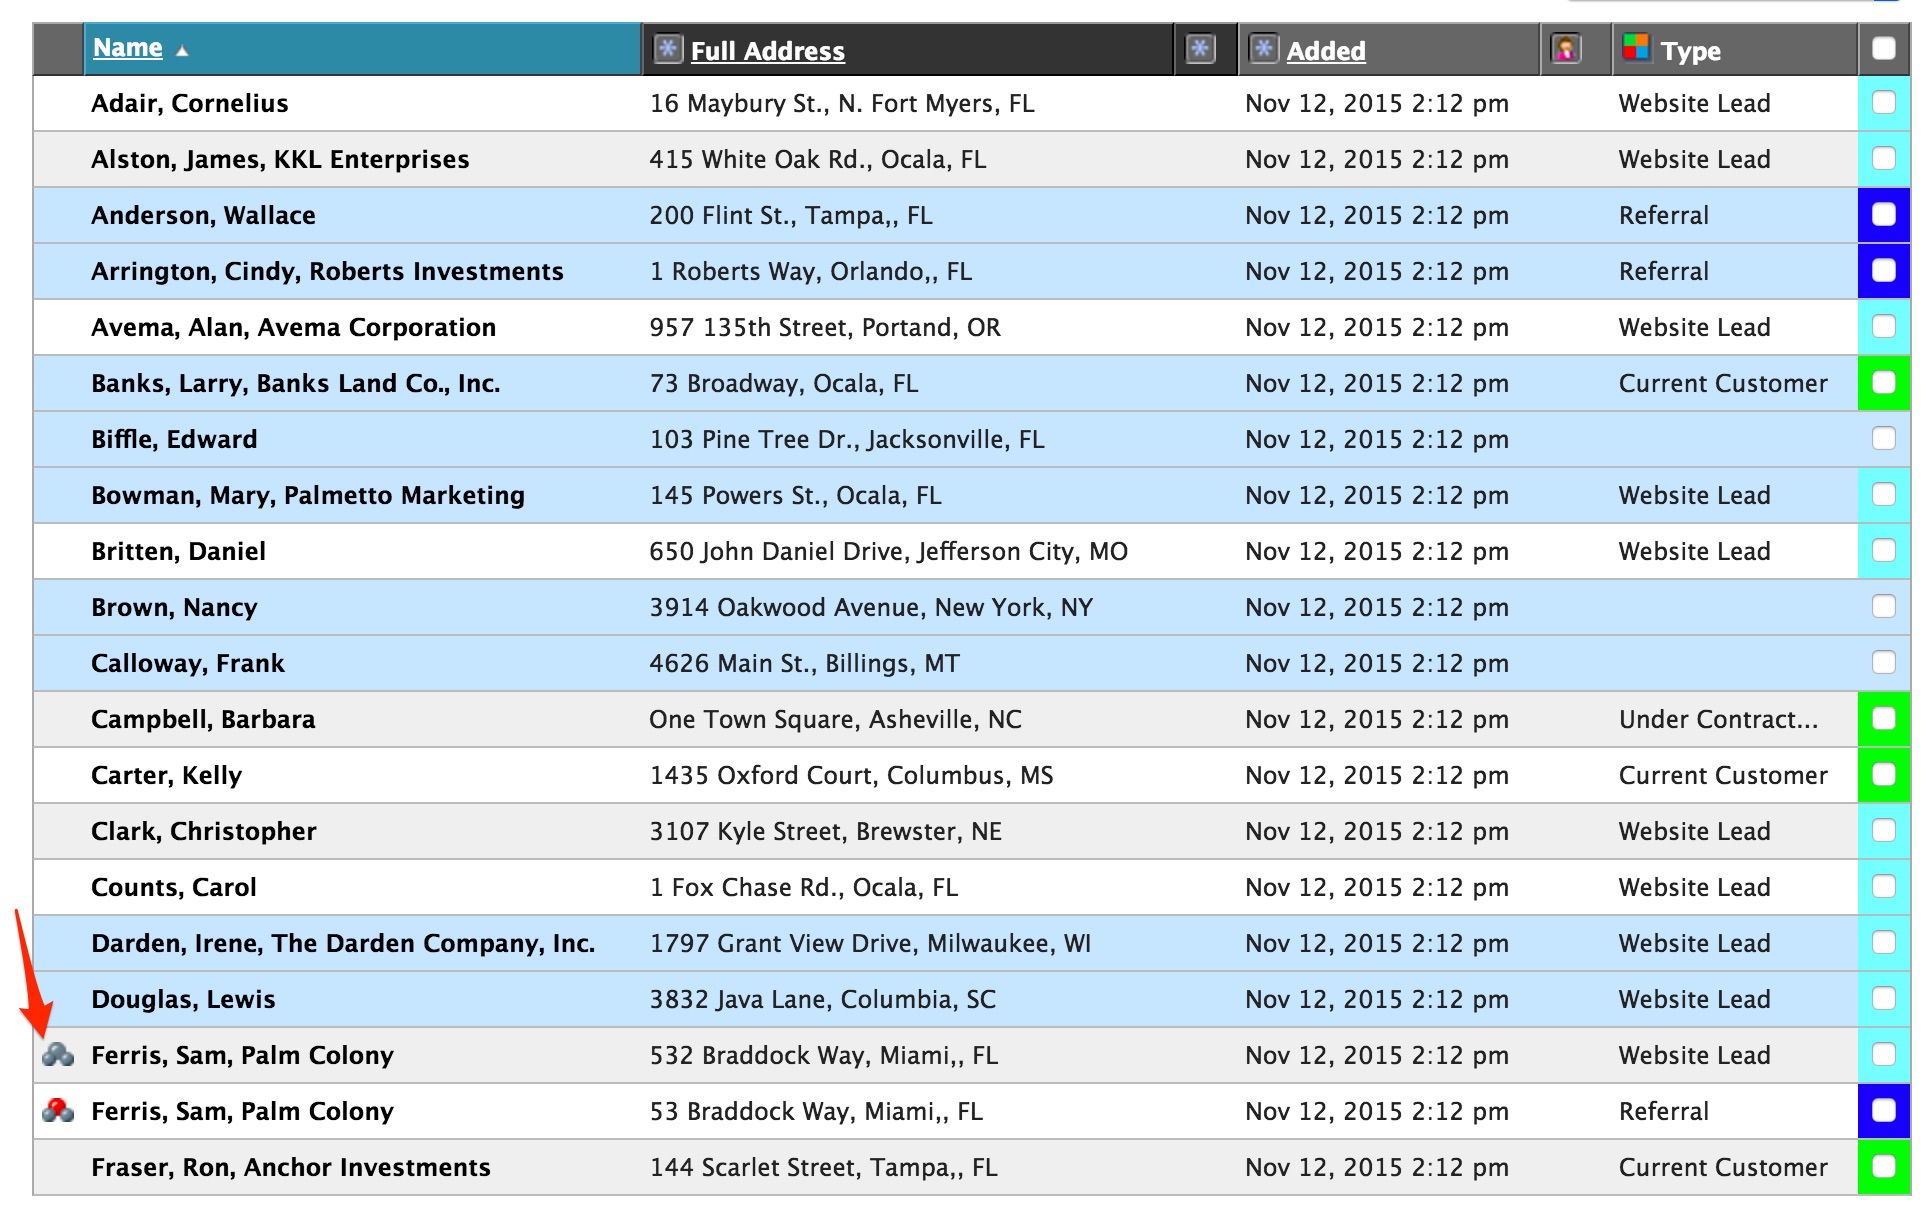
This makes the current lead the primary in the group, and then you will be able to add additional leads to this group by choosing "Add a Lead to this Group" or "Add a Form to this Group" and searching for and selecting them in the window that pops up. Once grouped, lead records are grouped together are marked by a special symbol in the far left column of the lead list.
Leads that are entered into Open Leads via a form can be grouped automatically by enabling that function on the form itself.
Grouped leads appear this way on the Leads tab:

Clicking on the symbol next to any grouped lead that appears on your lead list will display all of the leads that are in that particular group.

The grouping system is in essence a “Leads Merged” system. All information, comment, history etc. is viewed on one screen essentially merging the data into a single location, but retaining granularity for tracking, etc. We’ve also given you the ability to “Hide” Comments, History, Attachments etc. for all the other leads in that group so you can focus on just the lead you are working on.
Grouped leads can also be viewed as a list, and the same "mass" functions can be applied to this list - such as mass emailing, mass user reassignment, etc. - as with any other filtered list. To view a group as a list, click on the "Grouped" icon next to any lead that appears in that group on your lead list.
